Everyone received the same temporary password from IT. Your first job is to log in and set a password only you know.
-
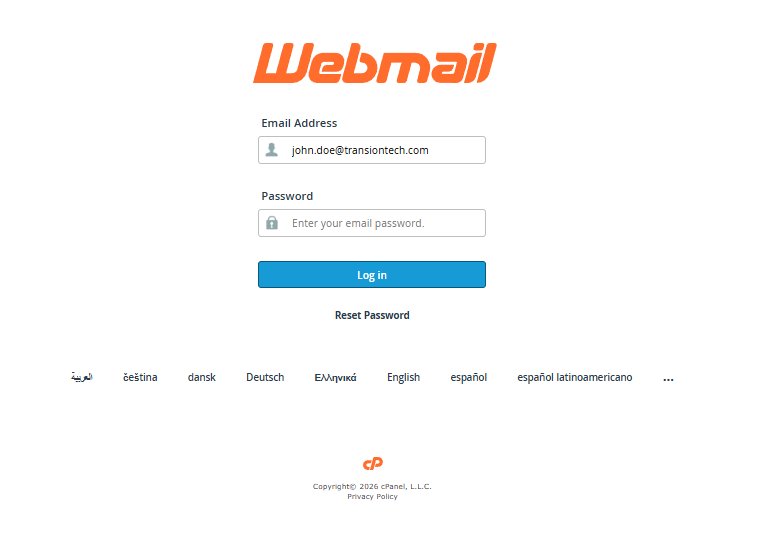
Open your browser and go to your webmail
-
Enter your full email addressFor example, jane@yourcompany.com — use the whole address, not just the part before the @.
-
Enter the temporary password from IT, then click Log in
-
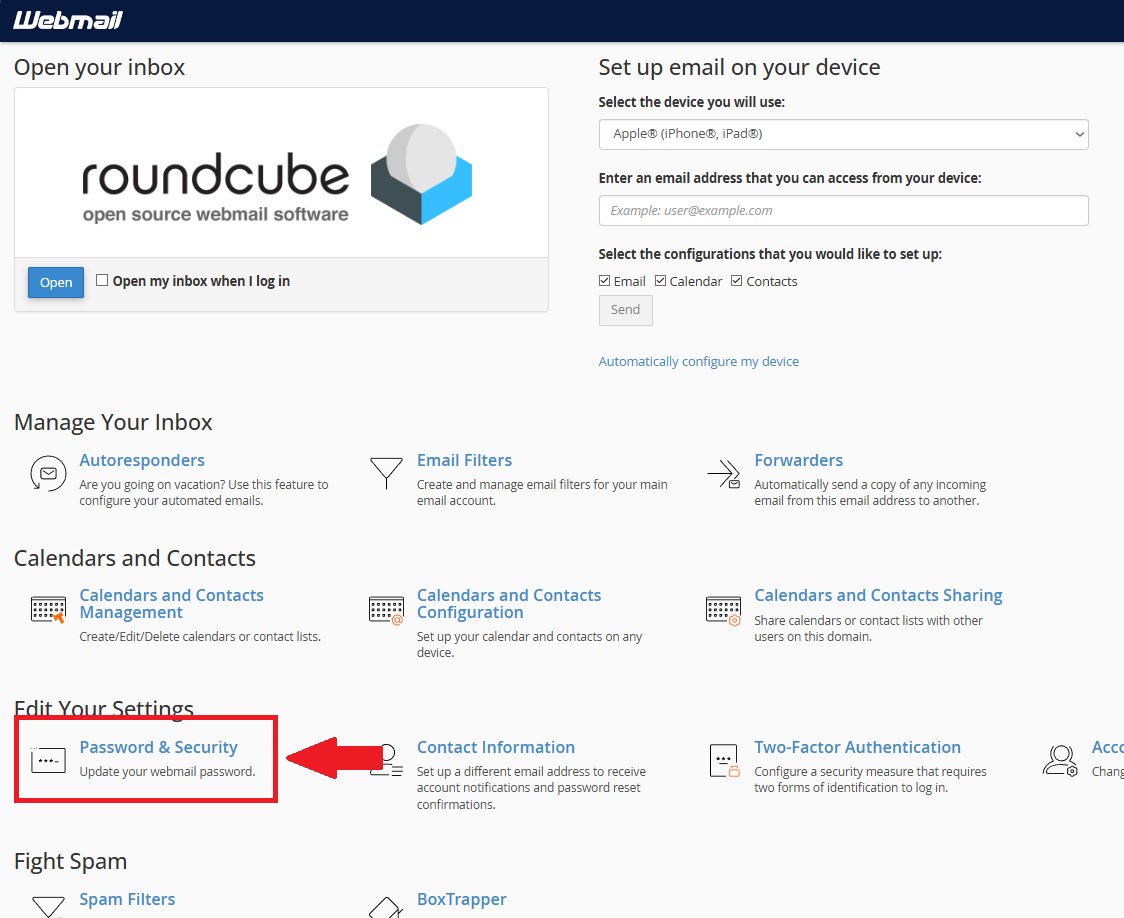
Open Password & SecurityOn the webmail home page, under the Edit Your Settings section, click Password & Security.
-
Set a new, strong passwordUse at least 12 characters mixing uppercase, lowercase, numbers and a symbol. Aim for a Strong or Very Strong rating on the meter.
-
Click SaveYou're done — your inbox is now protected by a password only you know.
Keep it private. Don't reuse the temporary password or share your new one with anyone. IT will never ask you for your password.
Next up: lock your account with two-factor authentication in Step 2.
2FA adds a second lock to your inbox. Even if someone learns your password, they can't get in without the 6-digit code from your phone.
Before you start: install an authenticator app on your phone — Microsoft Authenticator, Google Authenticator, or Authy all work.
-
Log in to your webmailGo to https://webmail.yourcompany.com and sign in with your new password.
-
Open Two-Factor AuthenticationOn the webmail home page, under the Edit Your Settings section, click Two-Factor Authentication, then click Set Up Two-Factor Authentication.
-
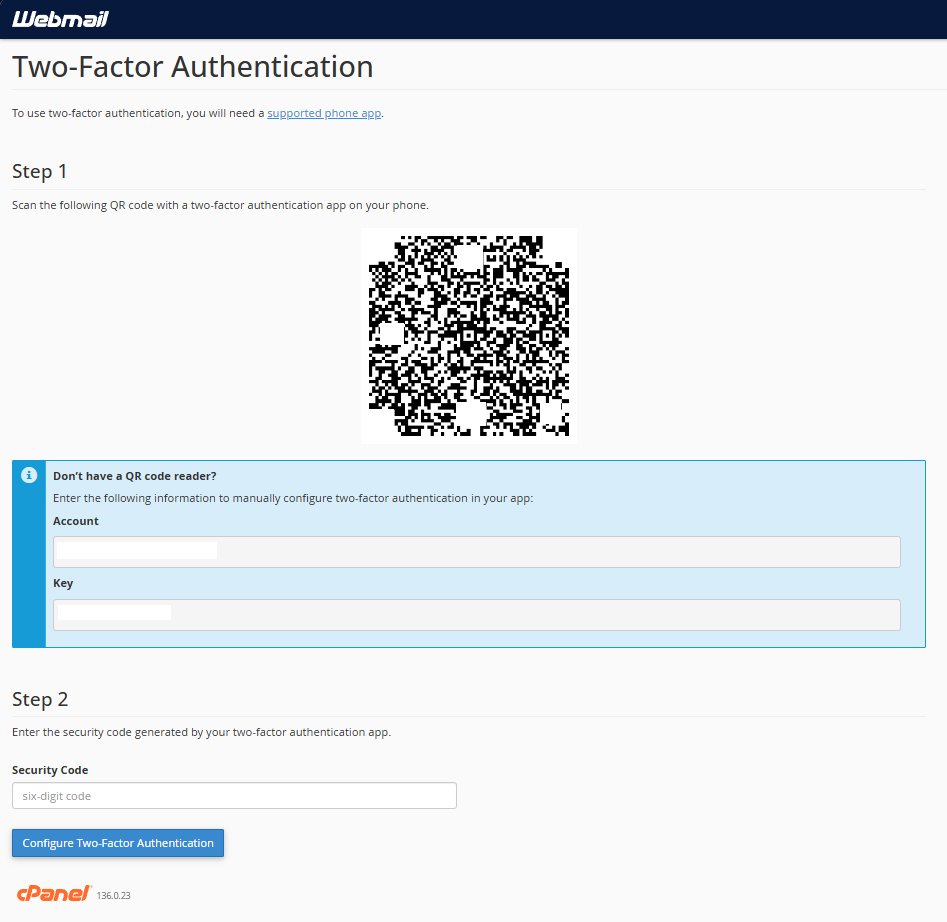
Scan the QR code with your authenticator appOpen the app, tap + Add, and scan the code on screen. Can't scan? Type in the secret key shown beside it instead.
-
Enter the 6-digit codeYour app now shows a code that changes every 30 seconds. Type the current one into the Security Code box.
-
Confirm to finishClick Configure Two-Factor Authentication. From now on you'll enter a fresh 6-digit code each time you sign in.
Save your recovery code. Store it somewhere safe, like a password manager. If you lose your phone, it's your way back in — otherwise you'll need to contact IT to reset 2FA.
Prefer to read your mail in Outlook, Apple Mail, or your phone's built-in app? Add your account with the settings below. We recommend IMAP so your mail stays in sync across all your devices.
Username
jane@yourcompany.comPassword
Incoming · IMAP
mail.yourcompany.comOutgoing · SMTP
mail.yourcompany.comAuthentication
Set up your app
Apple Mail · Mac
- Open Mail on your Mac
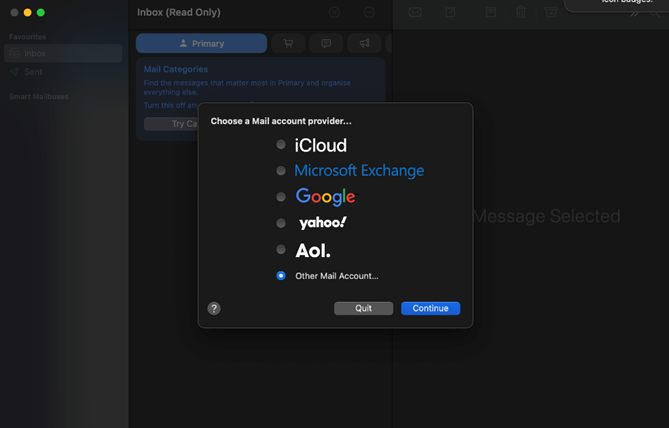
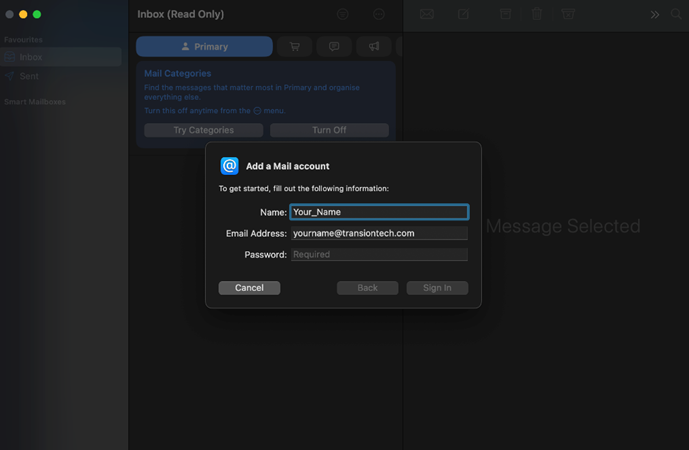
- Add an accountGo to Mail → Settings → Accounts → Add Account, choose Other Mail Account, then click Continue.
- Enter your detailsFill in your name, email address and password, then click Sign In.
- Configure servers if promptedBoth incoming and outgoing use
mail.transiontech.com, with your full email address as the username. Click Sign In → Done — your mailbox syncs automatically.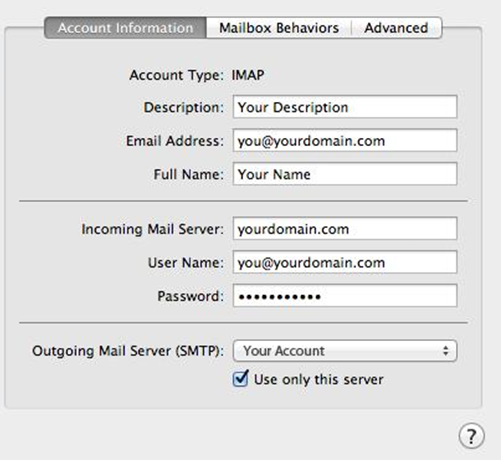
Apple Mail · iPhone / iPad
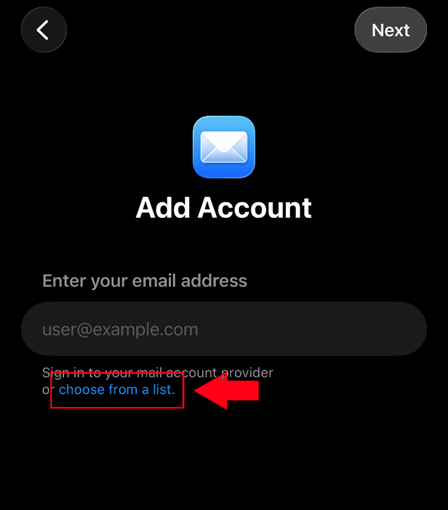
- Open the Add Account screenGo to Settings → Apps → Mail → Mail Accounts → Add Account.
- Choose from a listOn the Add Account screen, tap choose from a list, then select Other → Add Mail Account.
- Enter your detailsFill in your name, email, password and a description, then tap Next.
- Enter the server settingsSelect IMAP. For both the incoming and outgoing mail server, enter
mail.transiontech.comwith your full email as the username and your password. Tap Save.
Outlook · Windows / Mac
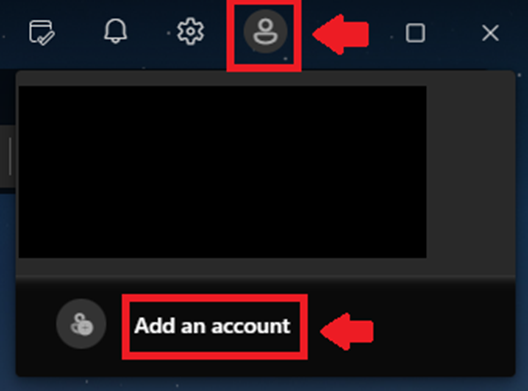
- Add an accountIn Outlook, click the account icon (top-right), then choose Add an account.
- Enter your email addressType your full email address, then click Connect.
- Manual setup (if required)Select IMAP. Incoming:
mail.transiontech.com, port 993, SSL/TLS. Outgoing:mail.transiontech.com, port 465 (or 587), SSL/TLS. - FinishEnter your full email address as the username and your password, then click Finish.
Gmail app · iPhone / Android
- Add another accountOpen the Gmail app, tap your profile picture → Add another account.
- Choose the account typeSelect Other.
- Enter your detailsEnter your email address and password. If manual setup appears, choose Personal (IMAP).
- Enter the server settingsIncoming:
mail.transiontech.com, port 993, SSL/TLS. Outgoing:mail.transiontech.com, port 465, SSL/TLS. Complete setup.
Always use SSL/TLS. Never choose "None" for security. If your app warns about a certificate, check the server name is exactly mail.yourcompany.com.
Don't want to install an app? Just open https://webmail.transiontech.com in your browser and sign in with your email address and password.